Channel packing grayscale textures in Krita
Last Updated on 7. January 2022
Channel packing is oftentimes used in game engines to reduce the number of individual texture files that need to be loaded by the engine. This tutorial explains how to pack grayscale images into the individual RGBA channels of a texture in Krita.
Channel packing demonstrated with example textures
I’m using the free MetalWalkway004 material as an example. I’m taking the Displacement, Roughness, Metalness and Opacity textures from this material and want to arrange them like this:
- Alpha channel: Opacity
- Red channel: Displacement
- Green channel: Roughness
- Blue channel: Metalness
If you don’t use an alpha texture (opacity) for your textures, just ignore the steps that involve opacity.
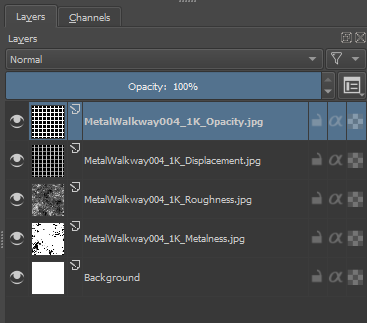
Open Krita and click on File -> New. Enter the Width and Height of your textures and hit Create. Then drag all your images into Krita. Choose “Insert Many Layers” in the pop up dialogue. You will end up with all images as individual layers. Do not delete the Background layer.

- Select the image you want to put in the red channel.
- Click on the drop-down box that reads Normal (it’s visible in the picture above). A big menu will open. Expand the Misc category and select Copy Red from this category.
- Repeat this for the two other textures that are meant to go into the green and blue channel. Make sure to select Copy Green and Copy Blue respectively.
- Drag the Opacity texture to the bottom of your layer stack, below the Background layer.
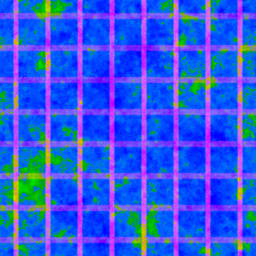
- You will see a colorful texture like this one:

Setting up the alpha channel
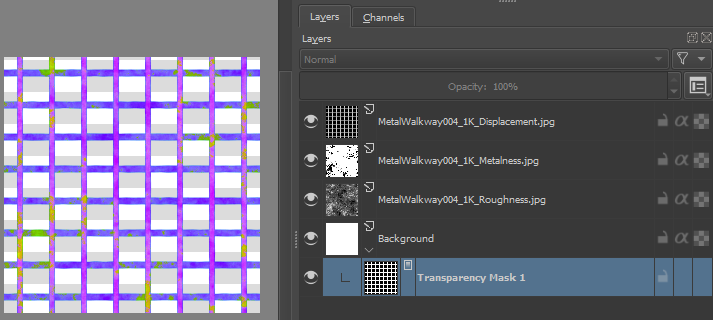
- Right click the Opacity texture and click on Convert -> To Transparency Mask. This uses the Opacity texture as a transparency mask for the layer above it. You will now be able to see transparent parts on your texture.
- If you should ever need to, you can reverse the last step by right-clicking on the Opacity texture again, followed by clicking on Convert to -> Paint Layer.

Exporting the texture
You have to export your texture as .png or .tga if it has transparency. The .jpg format does not support transparency. To export, click on File -> Export, choose a file name, a file format and an export location.
Remember to also save your project (Ctrl+S) if you want to have access to the layers we have set up after closing Krita. Exporting only exports a merged version of your layers, but doesn’t save the original structure.
Visit the Krita Tutorials main page for more Krita tutorials.

