
How to create vertex color channels and gradients for foliage in Blender
Last Updated on 1. August 2025
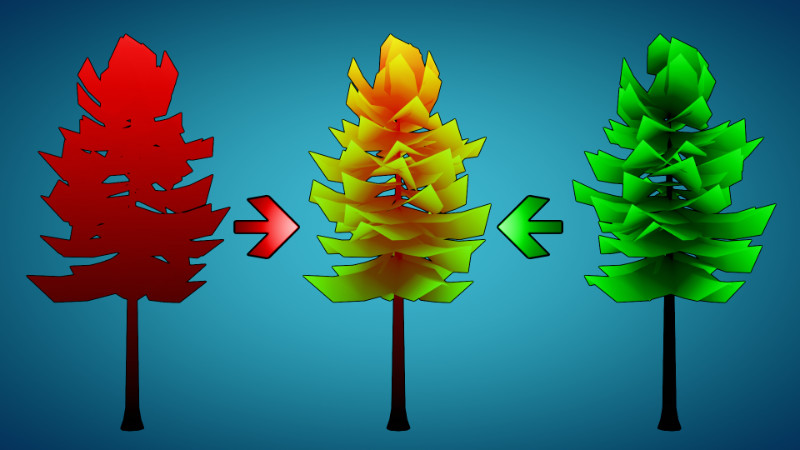
The Shader based foliage wind in Godot 4 tutorial explains how to create a wind shader for trees. The tutorial assumes that you’ve already created your vertex color setup. This tutorial explains how to actually create these vertex color gradients and how to mix multiple color channels.
How to visualize vertex colors
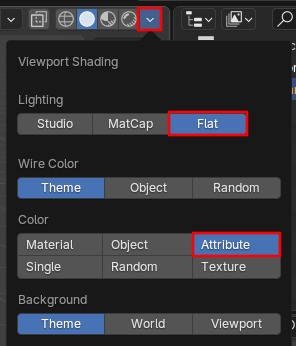
To see your vertex colors, click on the small black arrow at the end of the Shading menu, switch your Lighting to Flat and your Color to Attribute.
Start by painting your instances
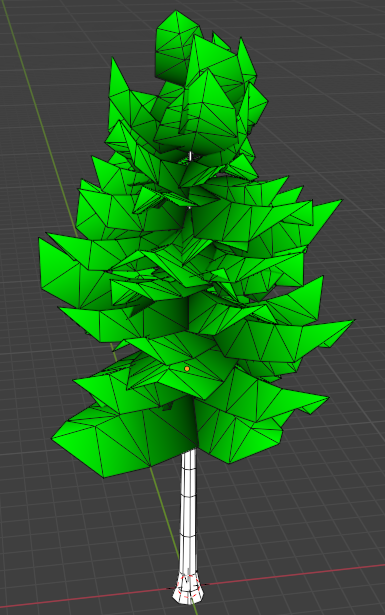
My tree is made up of two elements – a trunk and many instances of the same branch mesh. I assume your tree will look somewhat similar.
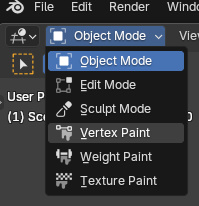
Select one of your branches in Object mode and switch to Vertex Paint mode.
- Press Ctrl + X to fill everything with the foreground color (black)
- Press X to switch background and foreground colors
- Click on the white color and make it fully green
- Click on the Paint Hard brush preset and switch it to Paint Soft
- Press F to increase the size of your brush until it covers the branch from tip to trunk. Confirm with left click. If you can’t make the brush any bigger, zoom out instead
- Click the branch’s tip once
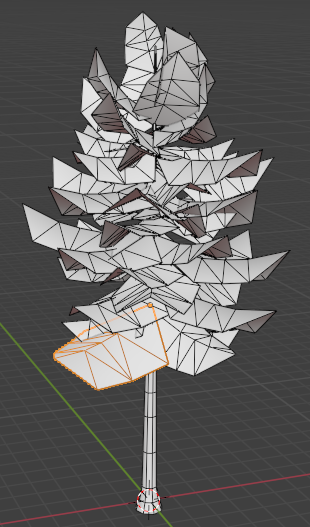
Your tree should now look like this:
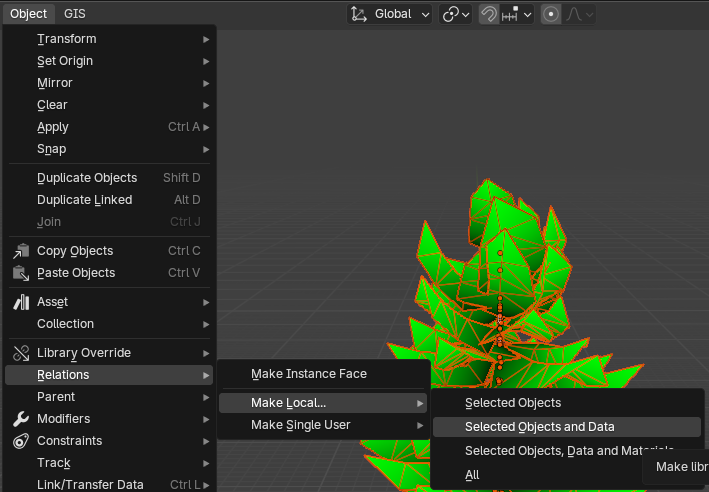
Unlink your branch instances
We need to create a red gradient from the tree’s top to its bottom. This is not possible as long as the branches are instances, because they’d share the same vertex color. Before continuing with the next step, you should make a backup (for example by using a new Collection) of your branch instances so you can go back to them later if you need to.
Then select all branches and go to Object > Relations > Make Local… > Selected Objects and Data. Your branches are now unlinked and no longer share the same vertex color data.
Merging the branches and the trunk
You can’t vertex paint on multiple objects at the same time, so we need to merge the branches and the trunk into one mesh. We need to do things in a certain order though.
First, select the trunk, switch to Vertex Paint mode and make it fully black. This serves two purposes:
- it’s required for the red gradient, because black indicates where the tree is not affected by wind. We’ll start with a black base and will add red on top later
- if you merge the branches into the trunk right away, your branch vertex colors will disappear, because the trunk did not yet have a vertex color layer
Second, merge your branches and the trunk together with Ctrl + J, with the trunk as the target.
Creating the red gradient
- Select your tree, then switch back to Vertex Paint mode
- Switch your foreground color from black to red
- Switch the Brush blending mode from Mix to Add. This ensures that the red color is added instead of overriding the green color we have painted previously
- Open the Falloff dropdown-menu and switch from Smooth to Linear. This allows us to create a linear gradient from top to bottom, otherwise you’d end up with a somewhat soft falloff that looks wrong
- Increase your brush size with F so you can point at the tree’s top and have the edge of your brush radius touch the tree’s base. Then click once on the very top of your tree
Editing vertex color channels separately
Right now (Blender 4.4.3) there is no convenient native way that I know of to view and edit the three vertex color channels separately. You are limited to using the Add and Subtract blend modes to paint or remove one layer at a time.
You can view individual channels though by creating a material for your tree, adding a Color Attribute node, piping it into a Separate Color Node and using the result as your Material Output. But this is only for viewing and doesn’t help with editing.

Visit the Blender Tutorials main page for more Blender tutorials.