Non-destructive sculpting in Blender with Shape Keys
Last Updated on 31. May 2022
This tutorial explains how to use Shape Keys in Blender to create sculpting layers that can be toggled on or off or faded in and out.
Mesh preparation before using Shape Keys
If your mesh uses a Multiresolution modifier, you need to apply it first. Having a Multiresolution modifier makes using Shape Keys impossible.
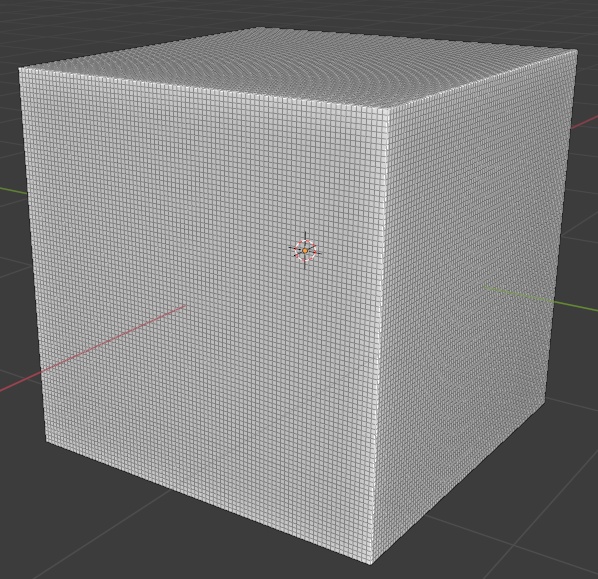
Your mesh should have the final topology you want to use before starting to sculpt, like this densely subdivided cube:

How to create Shape Keys
With your mesh selected, open the Object Data Properties (green triangle icon) in the vertical Properties panel on the right side of your 3D viewport. Open the Shape Keys category and click two times on the [+] button. You’ll get two new entries in the Shape Keys menu: Basis and Key 1.
Select Key 1 and drag the Value slider from 0 to 1 (or click on it and enter 1). Clicking on the Shape Key makes it active – all changes you make on the geometry of your mesh are now stored in this key. Setting its value to 1 sets the key’s impact to 100%. You can now start editing your mesh, either in Edit Mode or with Blender’s sculpting tools.
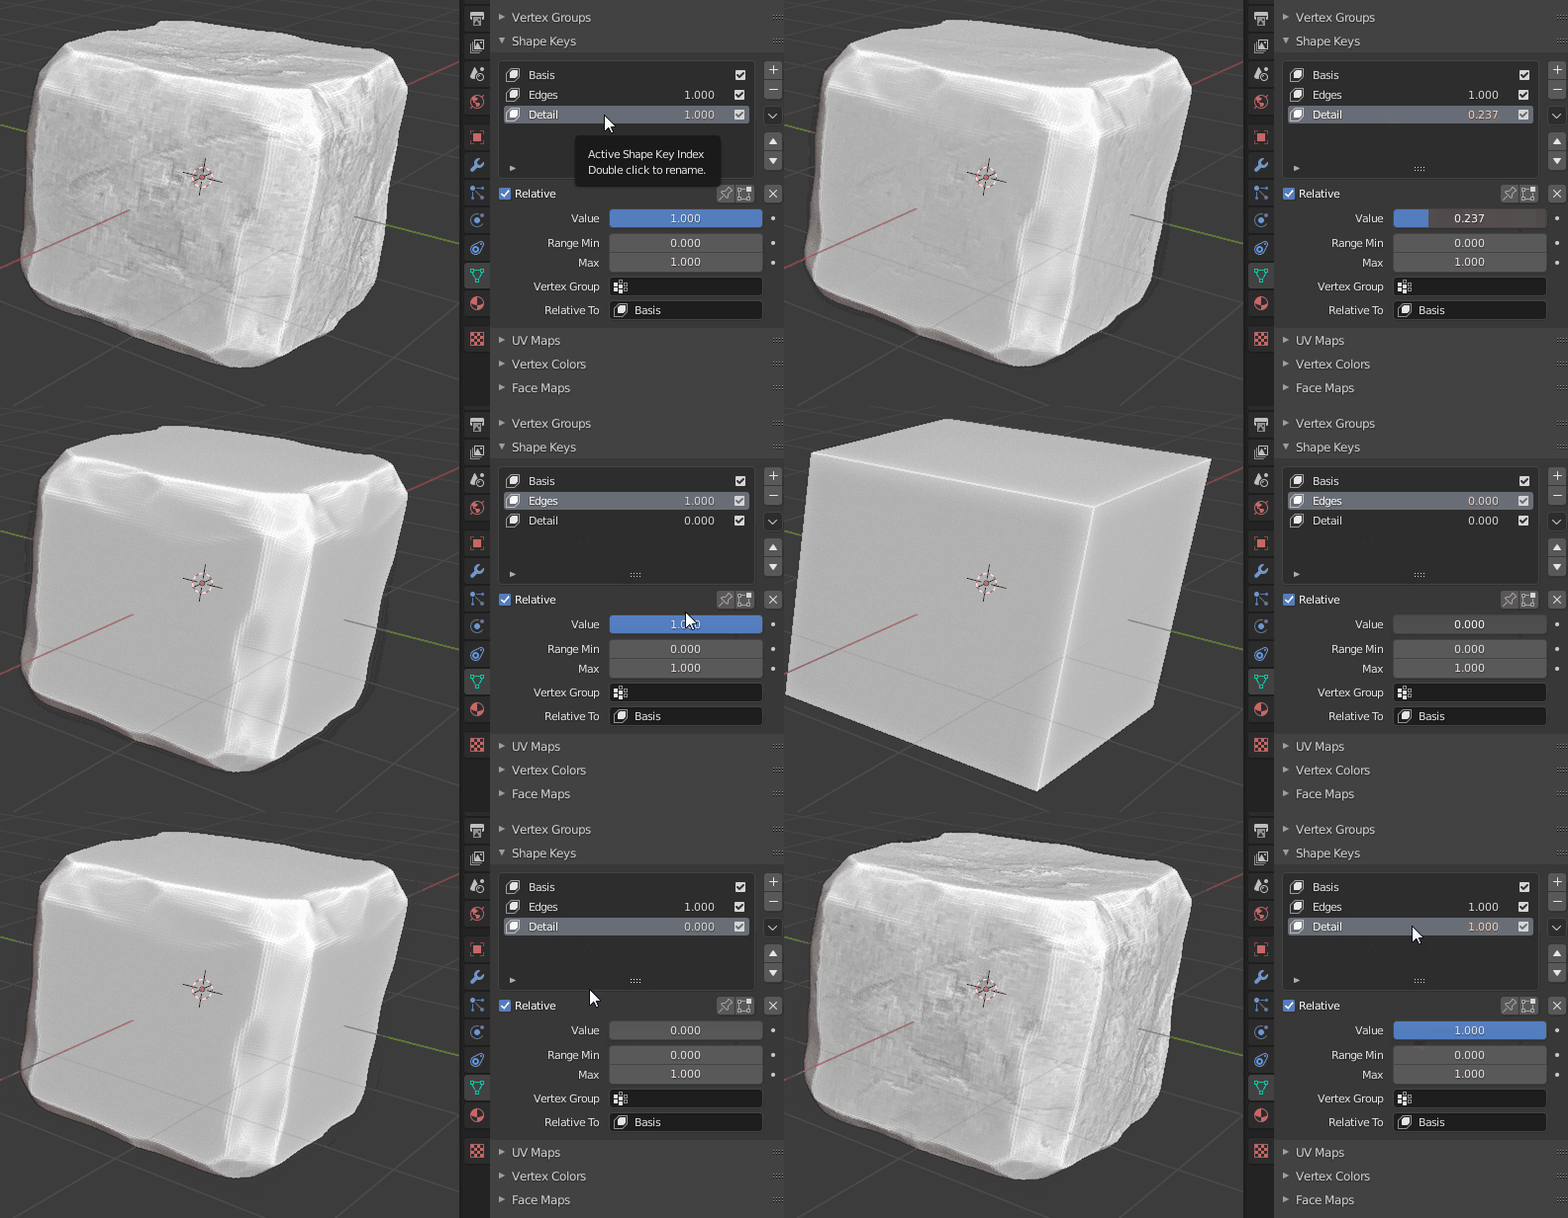
Create more Shape Keys for every type of detail you want to have in its own layer. In the following example I’ve created two shape keys and renamed them to Edges and Detail. I then selected Edges first, scraped off the major shapes of my cube, then selected Detail and added a bit of surface noise.

You can fade your changes in and out or even delete a Shape Key entirely. To do the latter, select a Shape Key and press the [-] button.
How to apply Shape Keys
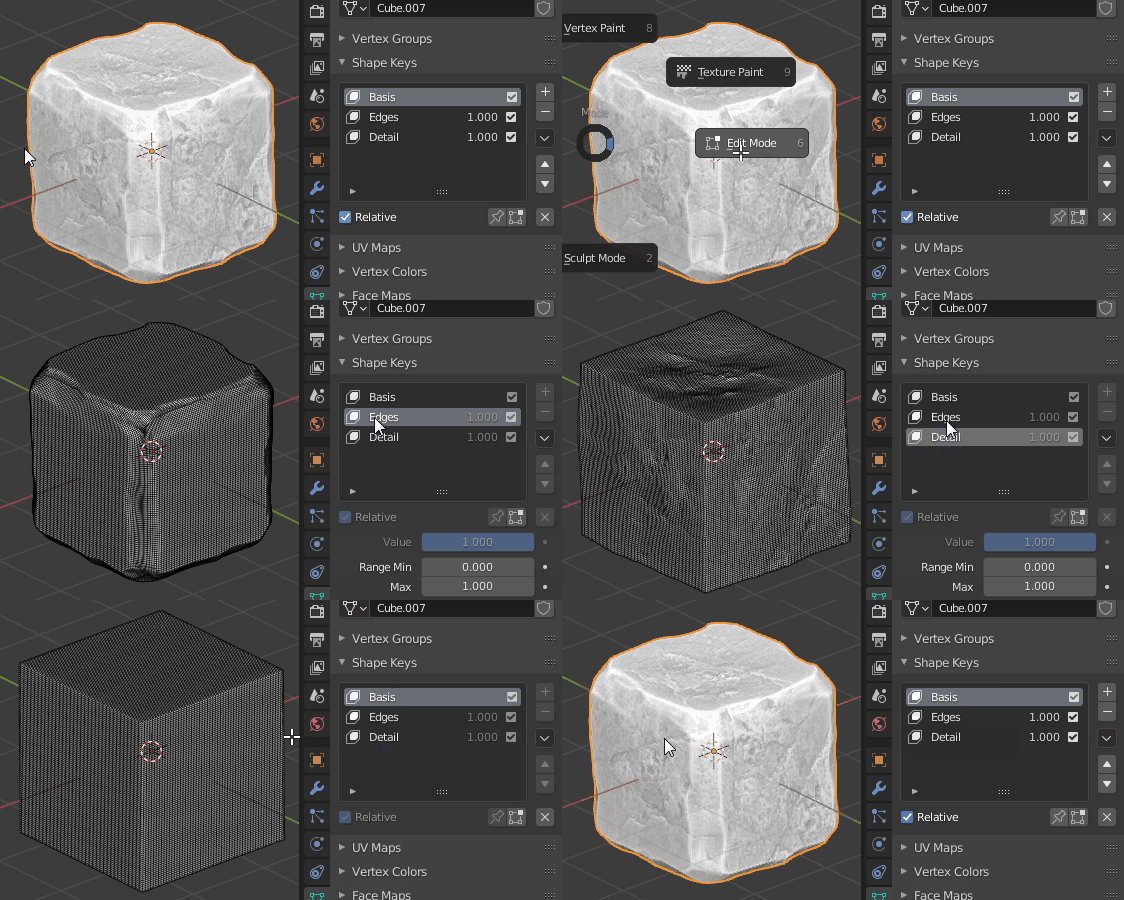
You’ll notice that when you switch to Edit Mode you can only see the changes of the Shape Key that you have currently selected, but not the final resulting mesh:

If you want to edit the result of all your layers in Edit Mode, you have to merge your Shape Keys fist.
Click on the small downward pointing black arrow button in the Shape Keys panel and select New Shape from Mix. You’ll get a new key with a default value of 0. This key contains the combined topology changes from all other keys.
Deleting unused keys
After you have created your merged key, you can safely delete all other previous individual keys, except for the Basis key. This allows you to still go back and forth between your original mesh and the merged changes.
If you want to completely delete all Shape Keys and don’t need the ability to edit them anymore, delete the merged shape key last and all other shape keys first. It doesn’t matter in which order you delete all other previous keys.
Visit the Blender Tutorials main page for more Blender tutorials.

