How to set up Texture Painting in Blender
Last Updated on 7. January 2022
I want to paint my mesh in Blender. How?
You have finalized your mesh and now want to paint it by hand. This guide will show you how to enable painting on your mesh.
First, you’ll have to correctly UV unwrap it. This guide does not cover how to do that – I’ll assume this step is already done.
1. You should see a Texture Paint tab in the toolbar at the very top of the screen. If you can see it, click it and proceed with step 2. If you can’t see it, please proceed with step 1a.
1a. If you can’t see the Texture Paint tab, you don’t have created your scene with the General preset. We can fix this easily. Click on File -> New -> General to create a new empty scene. Then click on File -> Open and press [N] to open the right toolbar. Deselect “Load UI”. Now open the scene with your object. Go back to step 1.
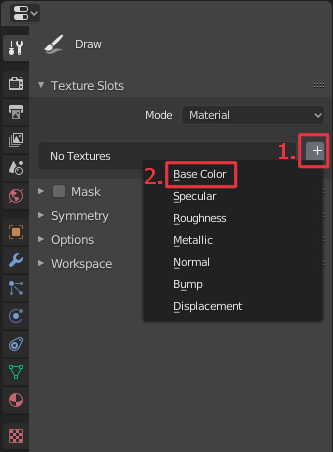
2. The property menu on the right side will change to the “Active Tool and Workspace Settings”. You should see a small [+] button in the Texture Slots category. Press the button, select Base Color, enter a name and resolution and click OK.

3. You can now already paint on your mesh, but the texture is not visible in the Image Editor on the left side of your screen. There are three buttons at the Image Editor’s top in the center: an image icon, a New button and an Open button. Press the image icon and select your newly created texture.

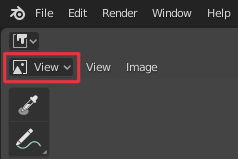
4. Switch the Image Editor’s mode in the top left from View to Paint. You’ll now be able to paint inside the Image Editor.

That’s everything you have to do – you can now paint on your mesh.
What’s happening under the hood?
I’ll explain some other things so you know how to fix broken materials and what’s happening under the hood, because following a step by step guide is cool, but it’s much better when you actually understand what you are doing and why.
The BaseColor texture slot you have added by clicking on that [+] button led to a number of things that you would usually have to set up manually.
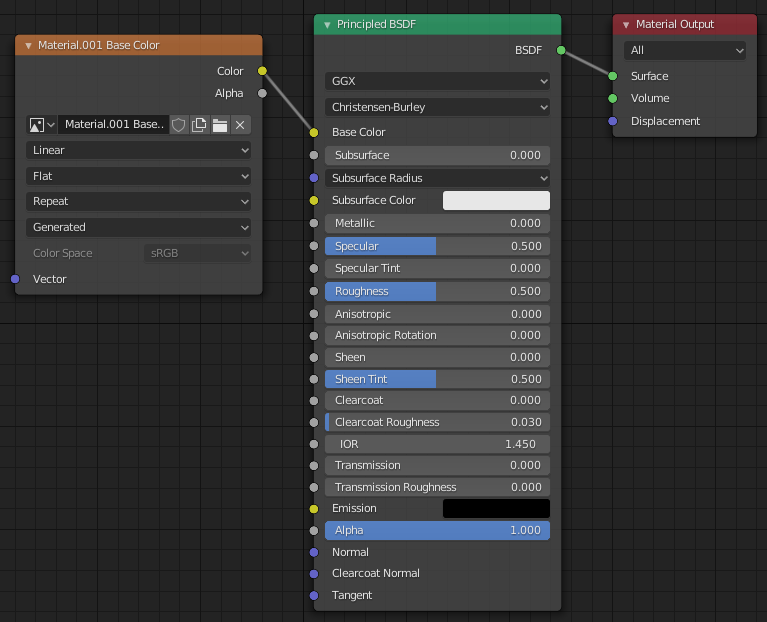
1. It creates a new material and applies it to your mesh. The material will be called Material.001. It uses the default PBR shader.
2. It creates a new Image Texture slot inside that material, adds an image to it and connects it to the PBR shader node’s Base Color input.
3. You can take a look at this by switching from the Texture Paint layout to the Shading layout by selecting the Shading tab in the toolbar at the very top of the screen. You’ll see the material at the bottom.

Visit the Blender Tutorials main page for more Blender tutorials.

