
How to make levels for Xonotic – Easy Quickstart Guide
Last Updated on 28. June 2026
This tutorial is a quickstart guide on how to set up the tools to create levels for the free open source shooter Xonotic. It explains how to download and install all necessary files and start NetRadiant, Xonotic’s editor.
Step 1: Get the very latest Xonotic files
Your Xonotic files need to be up to date if you want to make maps for the game. Read the short How to get the most recent Xonotic version by using autobuilds tutorial to learn how.
Step 2: Download NetRadiant, the editor for Xonotic
Go to the NetRadiant download page, scroll down until you find illwieckz’s NetRadiant builds and download the build for your operating system.
Extract the files from the archive to any place you like. If you are on Windows, continue with Step 3. If you are on Linux, you need additional files, otherwise NetRadiant won’t start.
Depending on your Linux distribution, you need to install different packages (quoting from netradiant.gitlab.io):
libgtkglext1 on Ubuntugtkglext-libs on Fedoragtkglext on Arch and Soluslibgtkglext-x11-1_0-0 on openSUSEx11-libs/gtkglext on Gentoo
If you run another distribution, look for the GtkGLExt package, this must also bring required dependencies. Other libraries are bundled
You can install these files through your Terminal. If you use any distribution that’s not based on Ubuntu you probably know how to do this. Here’s how to do it in Ubuntu and Ubuntu-based distributions (like Linux Mint, Lubuntu or Xubuntu):
Open a Terminal by pressing Ctrl + Alt + T. If that doesn’t work, search for the Terminal in your Applications menu. Paste this text sudo apt install libgtkglext1 into the Terminal by pressing Ctrl + Shift + V and then run it by pressing Enter.
You might be asked “Do you want to continue? [Y/n]”, which you confirm by pressing Enter again.
Step 3: Download the Xonotic Mapping Support Package
You do not need to perform this step if you have downloaded the Xonotic-latest-high.zip as described in the tutorial linked in Step 1, because it contains uncompressed textures that the editor can load.
First, download the Xonotic-latest-mappingsupport.zip. It contains uncompressed textures that the editor can load. Open the archive and go into the Xonotic/data folder, where you will find a file called xonotic-20170401-maps-mapping.pk3.
Move this file to the following location, depending on your operating system:
- Windows:
C:\users\user\saved games\xonotic\data - Linux:
~/.xonotic/data - Mac:
~/Library/Application Support/xonotic/data
If you don’t have these folders, start the game at least once.
You can ignore the files in the archive’s mapping folder, this is just a very old NetRadiant version. The one you have downloaded in Step 2 is more recent.
Step 4: Starting NetRadiant
Open the NetRadiant folder that you have extracted in Step 2. If you are on Windows, start the netradiant.exe and skip the next two bulletpoints with explanations for Linux. If you are on Linux, you might not be able to start NetRadiant by double-clicking the NetRadiant file. There are two easy solutions:
- Open a Terminal, drag and drop the netradiant file into it and press Enter
- If your distribution can create Launchers, create a new Launcher and point it to the netradiant file. If you aren’t sure how to create a launcher, search for “How to create a launcher in [your Linux distribution]” in a search engine of your choice.
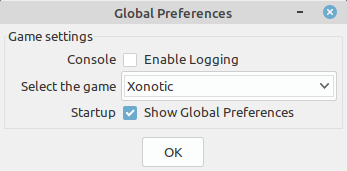
Once NetRadiant starts, you need to select Xonotic from the list of available games. You can uncheck the Show Global Preferences box if you don’t want to see this question every time you start NetRadiant.
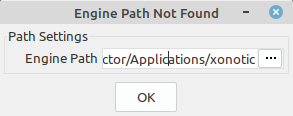
You’ll then see an Engine Path Not Found window, because NetRadiant does not know where your Xonotic folder is located. Point it to the Xonotic folder you have extracted in Step 1.
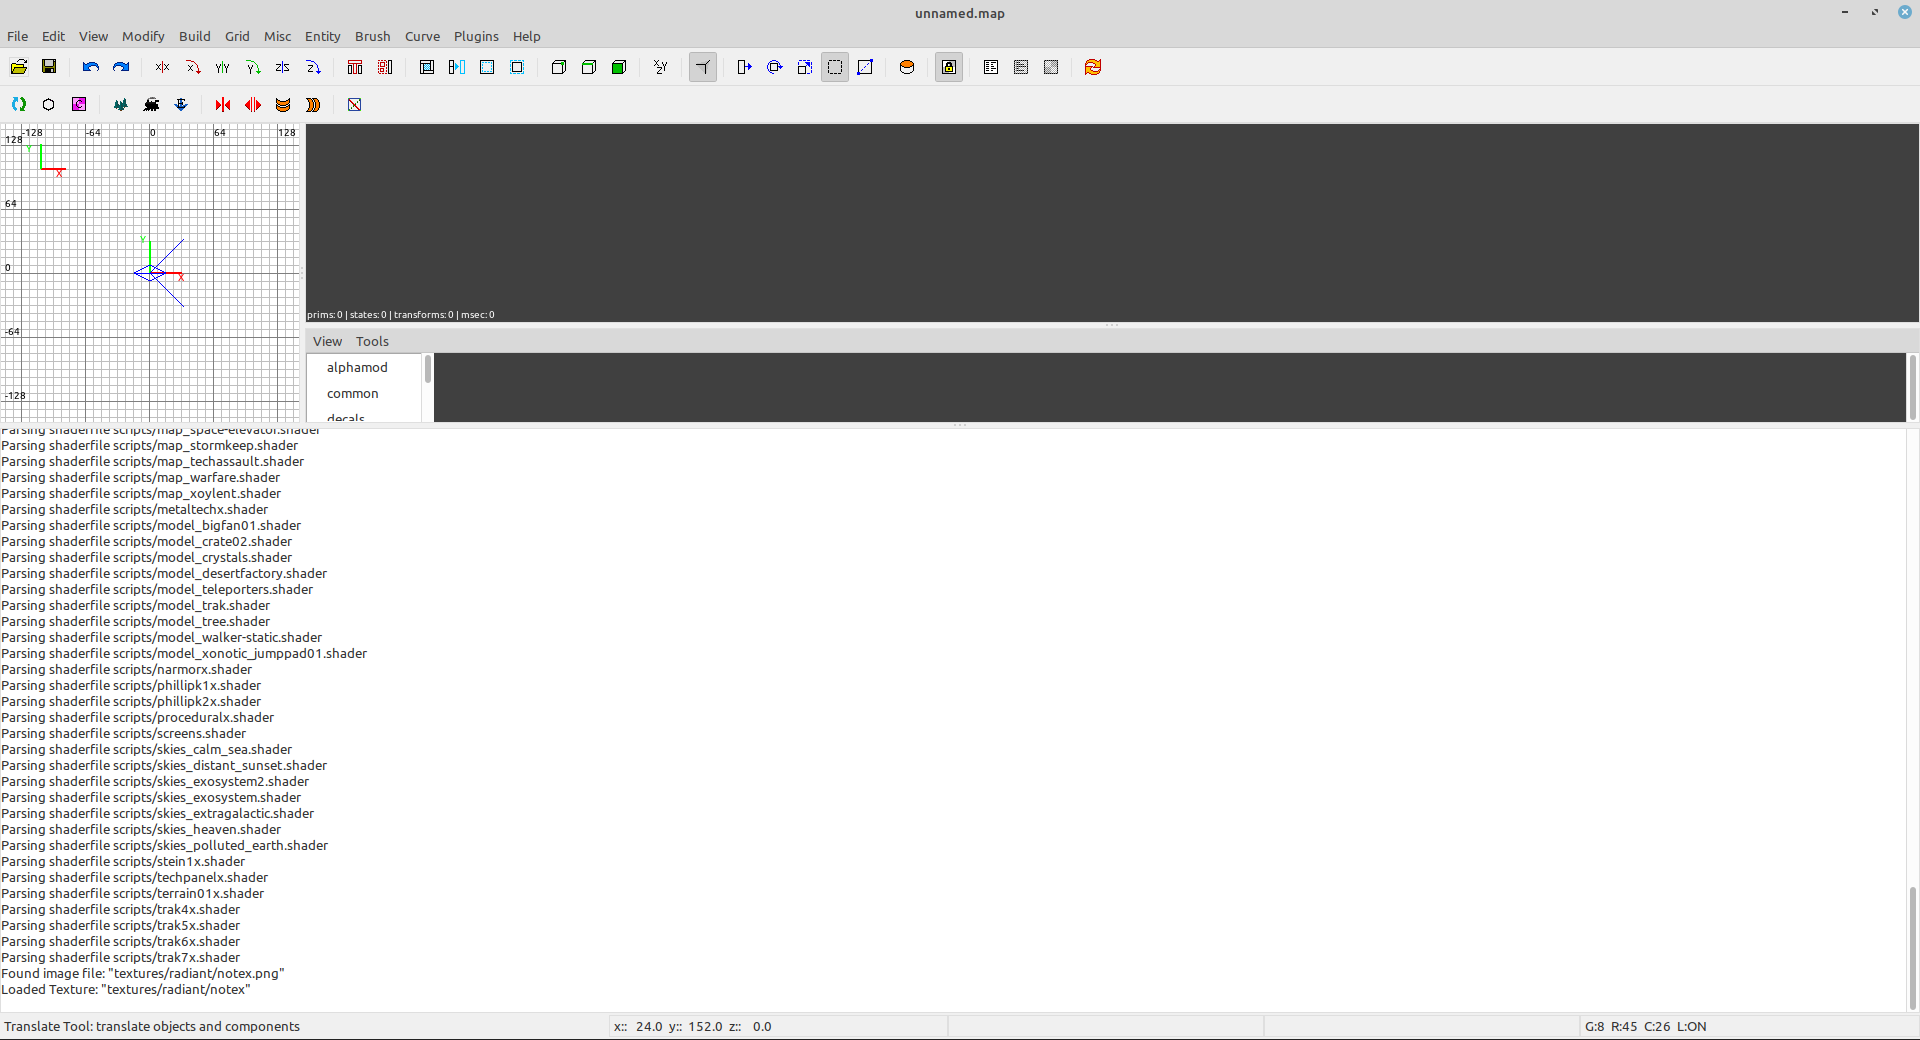
The editor will then open and you’ll see the default layout and an empty level.
Step 5: How to create your first map
This tutorial only covers how to get the tools running, but I’ll link some other tutorials so you can configure NetRadiant correctly and start making your first map.
Tutorials for Quake 3 apply to Xonotic
NetRadiant is a generic editor that can be used for many different games that run on Quake engines, not just Xonotic. Xonotic uses the DarkPlaces engine, which is based on the Quake 1 engine. Because of the editor’s generic nature, you can read tutorials for other Radiant variants and games and they still apply to Xonotic.
My Quake 3 Mapping Tutorials page has more than 40 tutorials about Quake 3, most of them work for Xonotic too. You can use the Google Translate option on the Quake 3 Tutorials main page if you don’t understand German. The translations are a bit wonky at times, but they are still readable.
I suggest you start at Tutorial 04 (Radiant configuration) to improve the unusable default viewport layout as fast as possible. Then continue until you have finished tutorial 10. These 6 short tutorials cover the very basics.
Tutorial 01 lists all hotkeys, tutorial 03 gives you an overview over the tools/common textures.
You can ignore tutorial 02 because you are using a different Radiant and don’t need files for Quake.
The official Xonotic Wiki is very helpful
Have a look at the official Xonotic Wiki on Gitlab, where not only the game itself is explained in detail, but you’ll also find many useful editing guides.
Tutorials for other Radiant versions
You can also use every Radiant tutorial for any other Radiant, as the workflows are all the same, even if the editors might look slightly different or can be very old. Other famous Radiant versions are:
- GtkRadiant, which NetRadiant is based on. My Quake 3 tutorials are written for it
- DarkRadiant for The Dark Mod
- UFORadiant for UFO:AI
- QeRadiant for Quake 2
- Q3Radiant for Quake 3
Visit the Xonotic Tutorials main page for more Xonotic Tutorials.