
Photogrammetry manhole cover
Last Updated on 20. October 2025
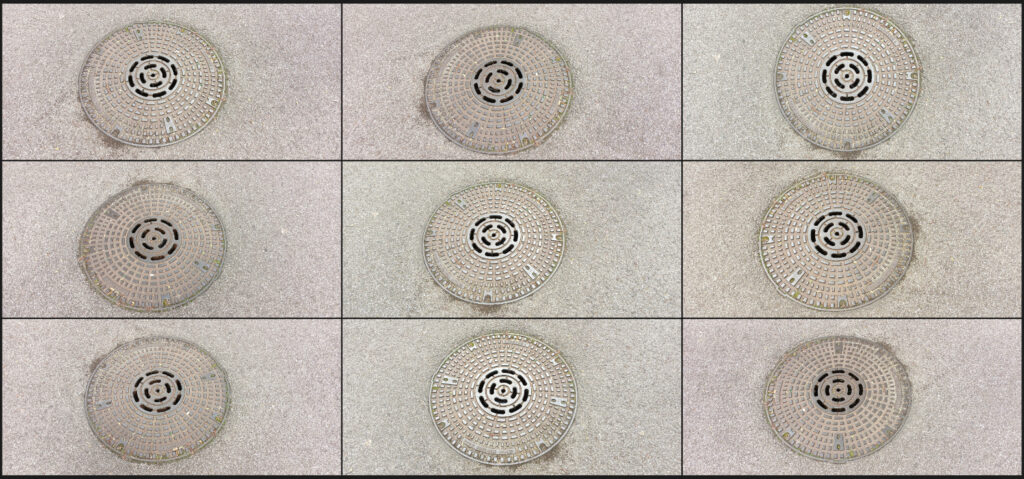
Taking the source pictures
This manhole cover PBR material was created in Agisoft Metashape and Blender. I started by taking various pictures of a manhole cover that I found while I was on a walk. The lighting was not ideal, because the sun caused reflections on the metal depending on the view angle. If possible, you should take photogrammetry pictures on an overcast day, because you don’t get any highlights, strong shadows or color tints. The final asset turned out better than expected though.
Creating the highpoly mesh
I then loaded these pictures into Agisoft Metashape, a paid photogrammetry software. As of October 2025, the Standard version costs 179€ (this post is not sponsored by Agisoft, I just happen to use and like their product).
If you want to get into photogrammetry without paying anything, try out Meshroom. It’s a 100% free and open source photogrammetry software.
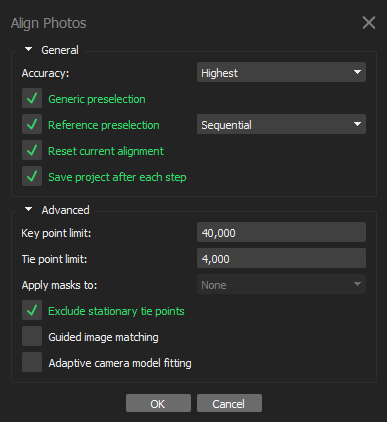
I simply added the photos via drag-and-drop into a new Metashape project and aligned them via Workflow -> Align Photos. These were my settings:
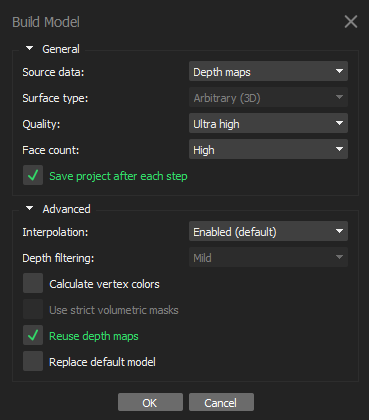
I then let Metashape generate the highpoly mesh via Workflow -> Build Model. I used the following settings:
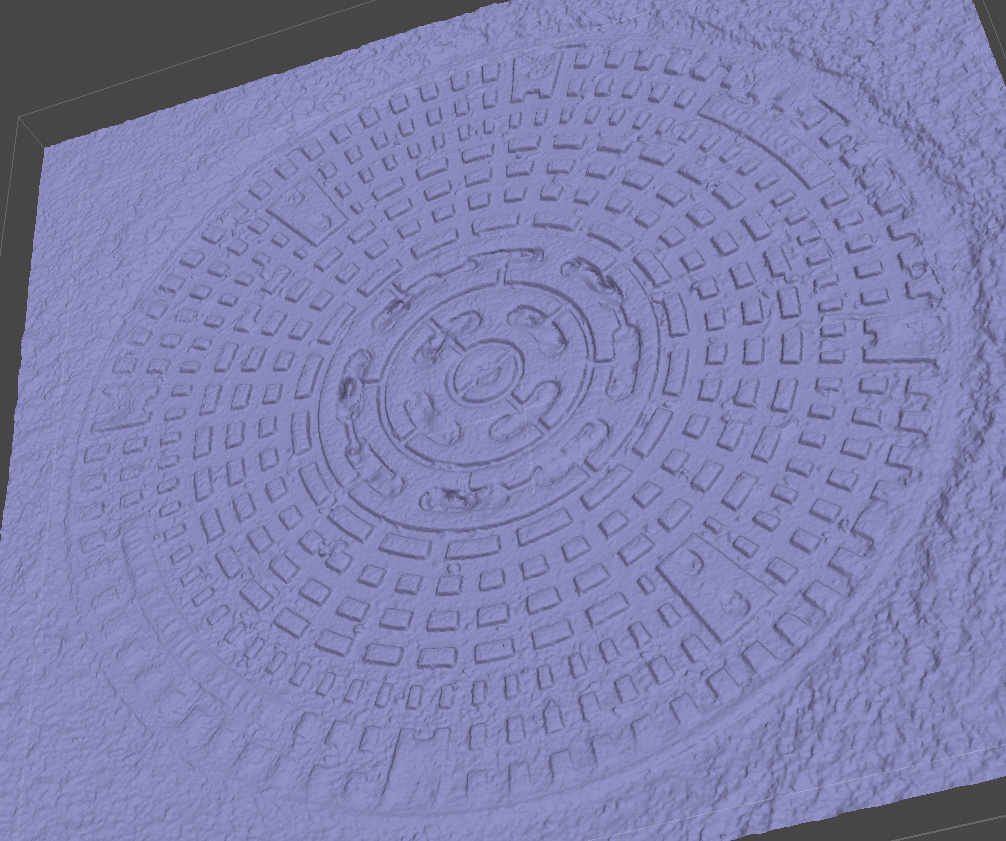
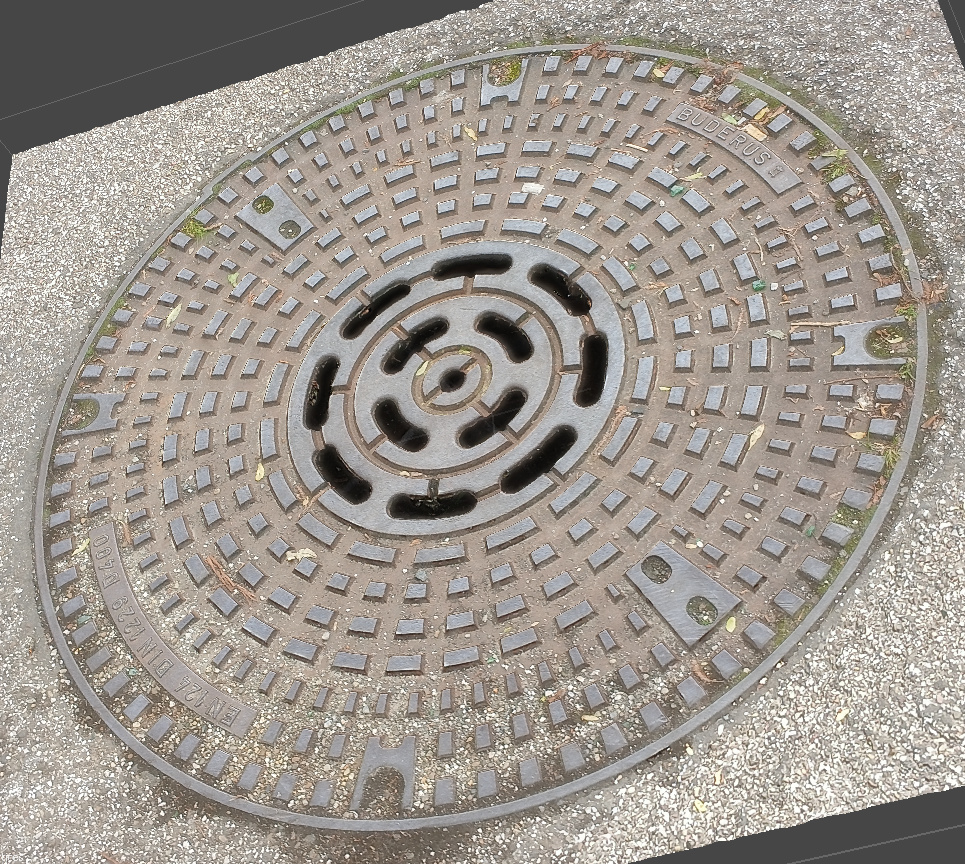
Metashape then generated this lovely high resolution mesh based on the photos:
I then let Metashape generate the texture via Workflow -> Build Texture.
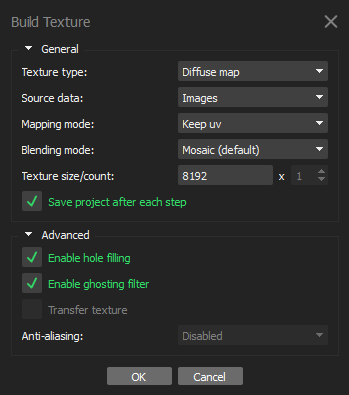
The result turned out to be very nice:
Preparing the PBR textures
I then imported the highpoly mesh in Blender. The diffuse texture is ready to use, but I needed a roughness map, metalness map, normal map and an alpha mask that removes the road and the holes in the center.
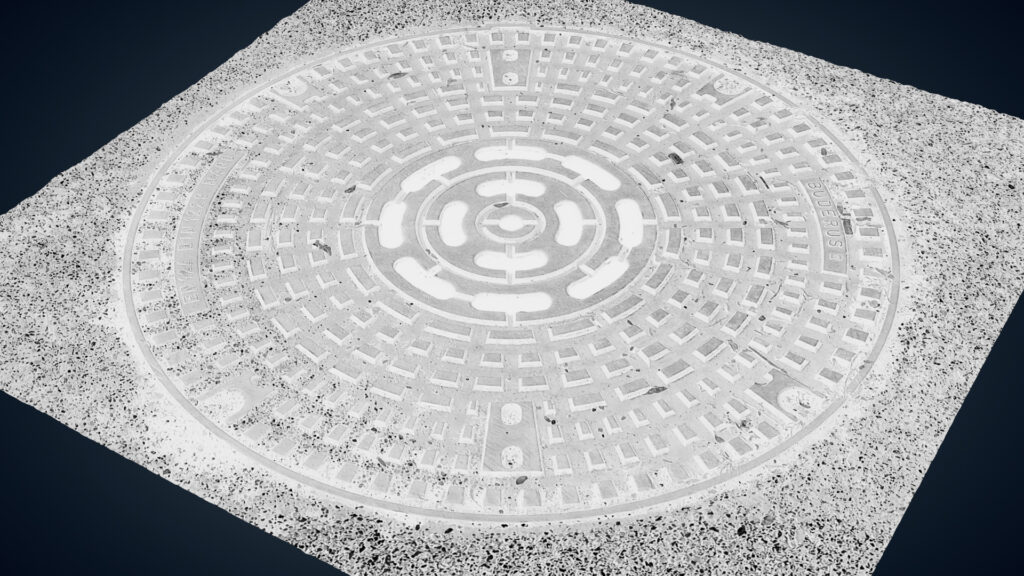
The roughness map
The roughness map was quite simple to generate. It’s just an inverted albedo, with slightly adjusted ranges:
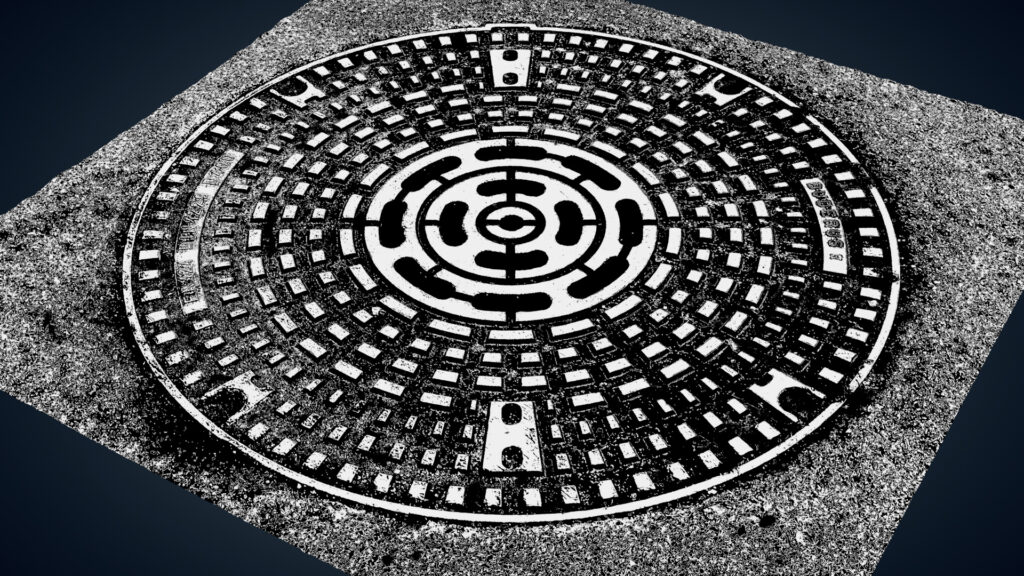
The metalness map
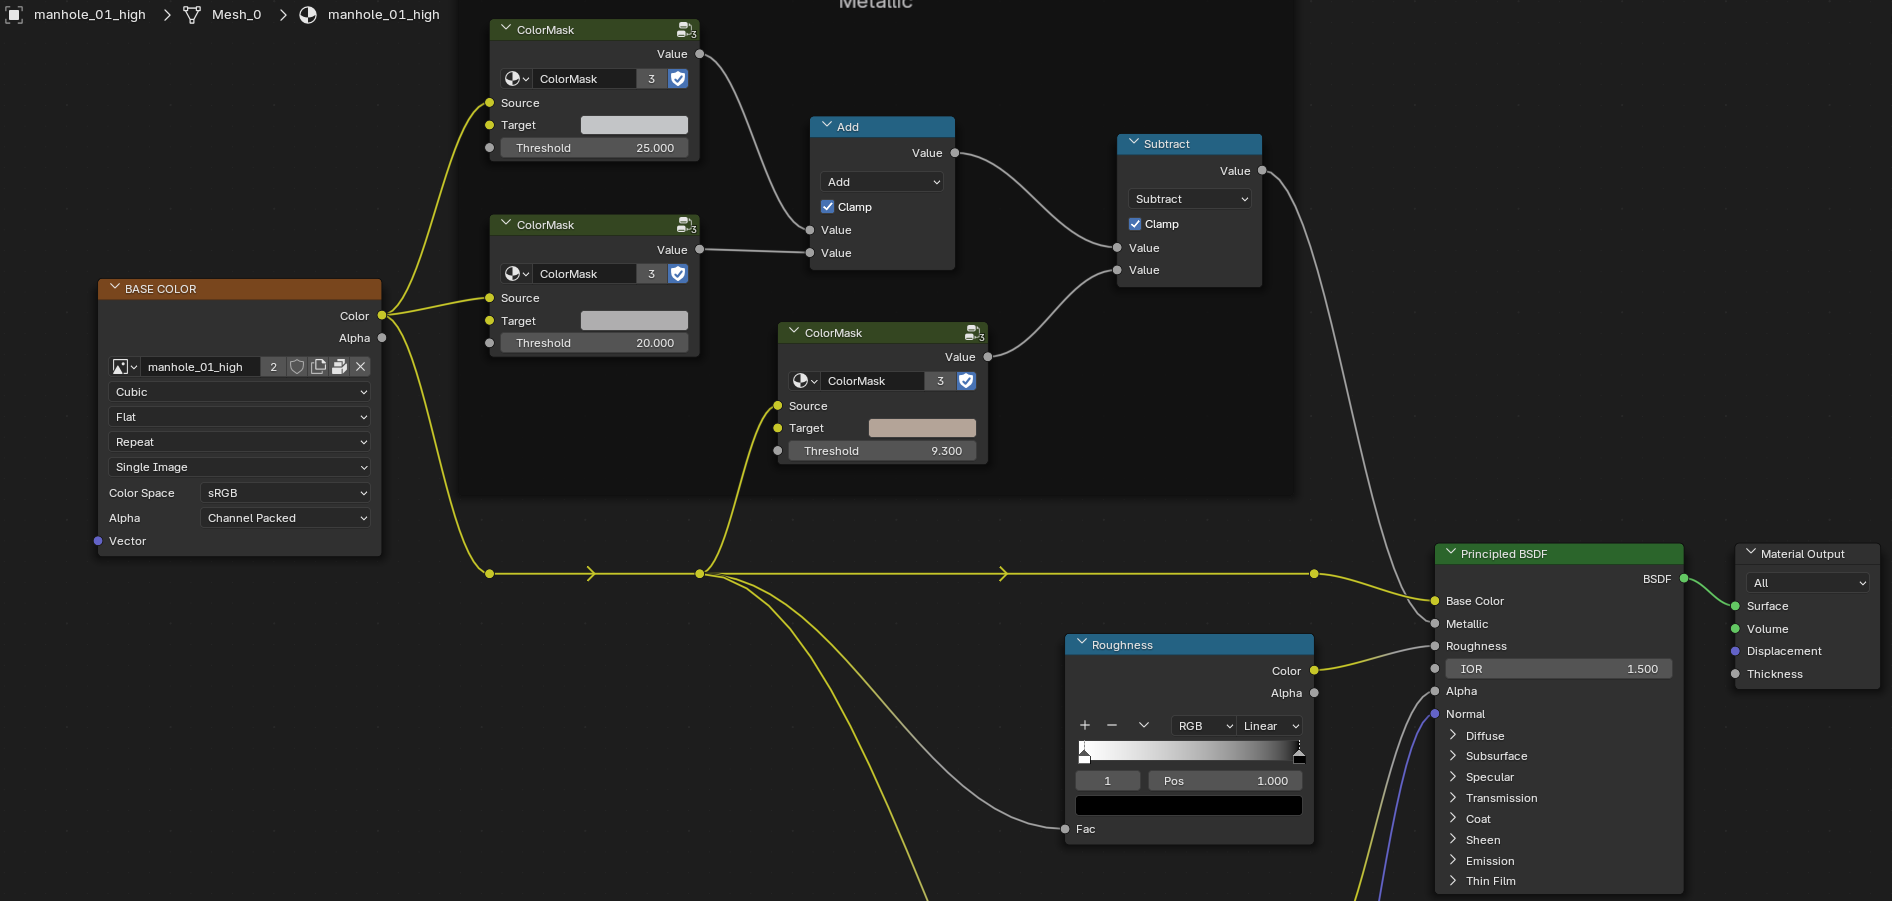
The metalness map turned out to be a bit more complicated. I needed to create a mask for the metallic color, but I wanted to keep everything dynamic and stay inside Blender. So any image editing software or Substance Designer were no option. The following picture shows the result that I was able to generate in Blender. Ignore the metallic ground – the ground will be removed later via an alpha mask.
I created this mask by making a custom color mask node group. This group allows me to create a black and white mask from a picked color. This way I can add colors that I want and subtract colors that I don’t want. This is what the setup looks like:
And this is what the ColorMask group looks like from the inside:
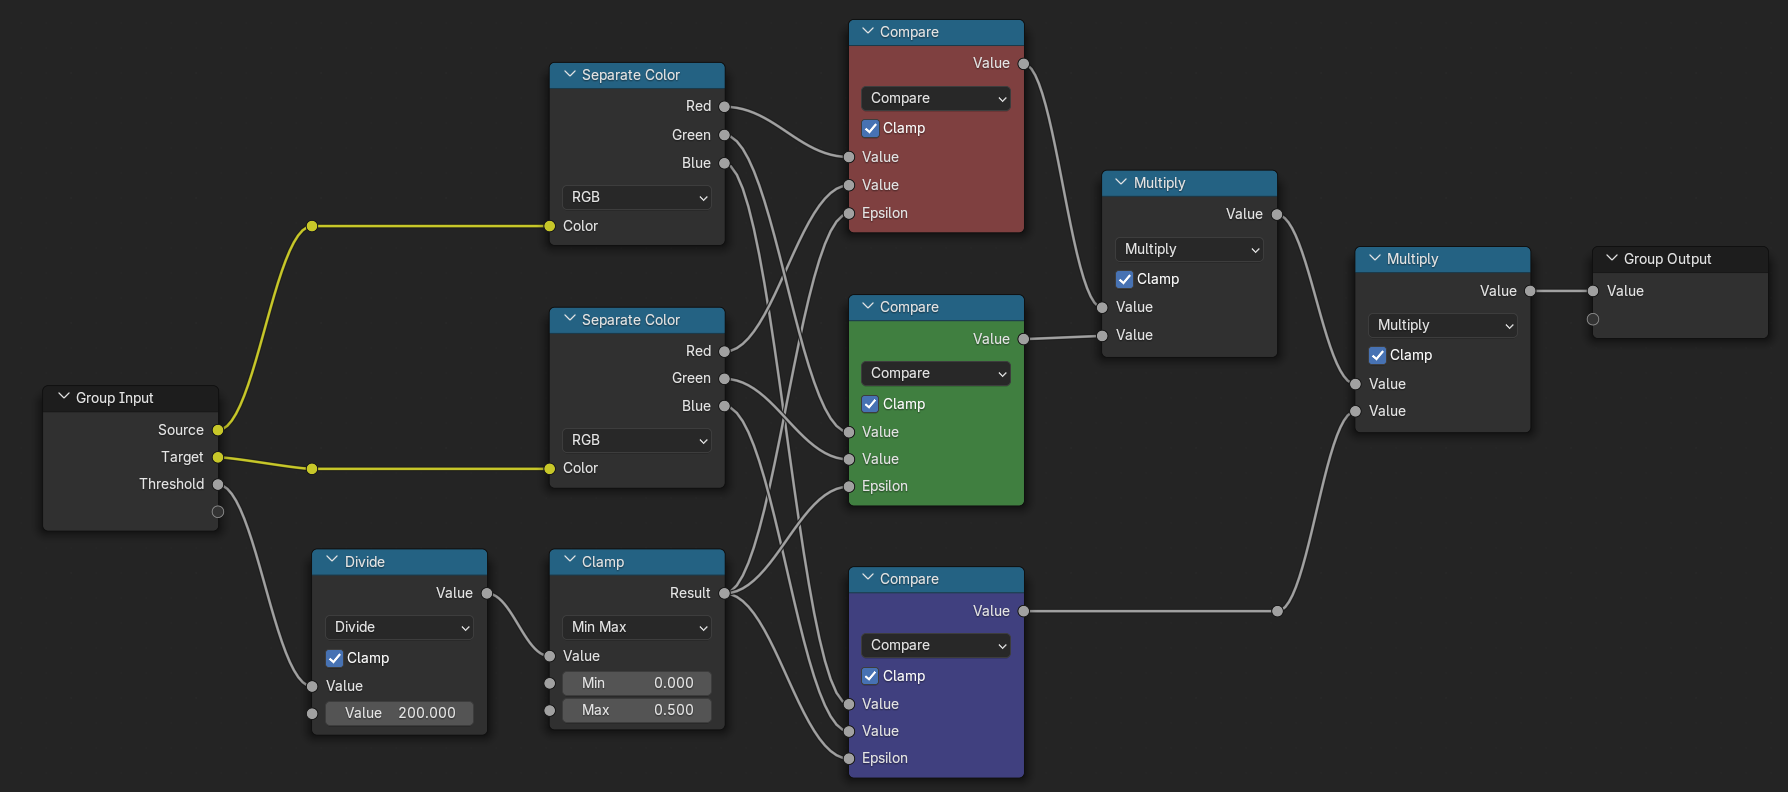
My diffuse texture is the Source color, the color picker is the Target. I split both into separate RGB channels and use a Compare node to compare each channel individually. The Epsilon value determines how high the threshold for comparison is. This value usually goes from 0.0 to 0.5, so I divided my input value by 200. This allows my to select a threshold from 0 to 100, which is easier to understand and edit.
I then multiply all three channel masks with each other, which gives me a color mask.
The normal map
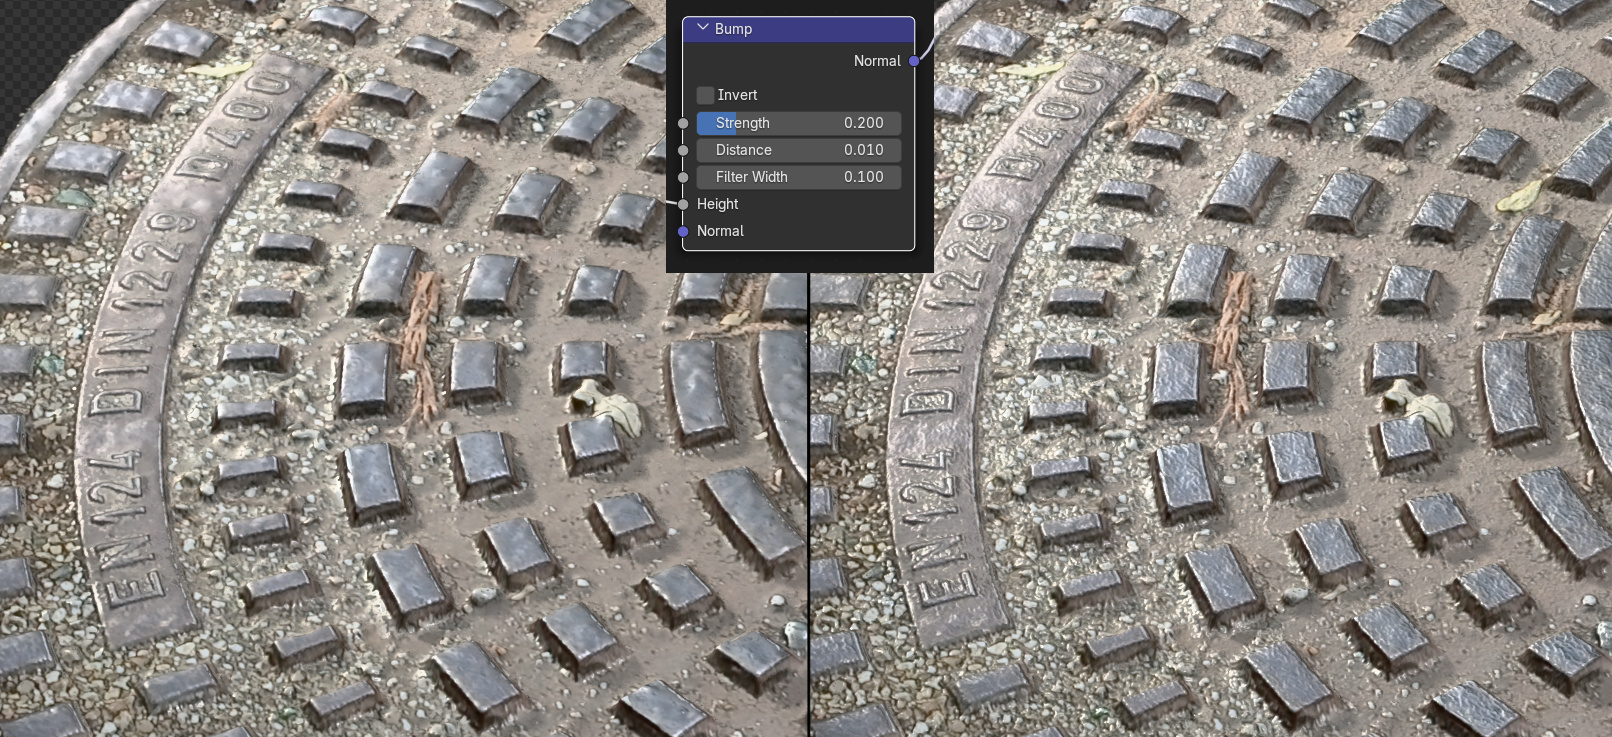
The normal map that will be generated by baking the highpoly mesh is already very helpful, but it lacks microdetails. To add more grain to it, I fed the highpoly’s diffuse texture into a bump node. On the following picture, you can see the highpoly. On the left without a normal map, and on the right with a normal map created by plugging the diffuse map in a bump node.
The alpha mask
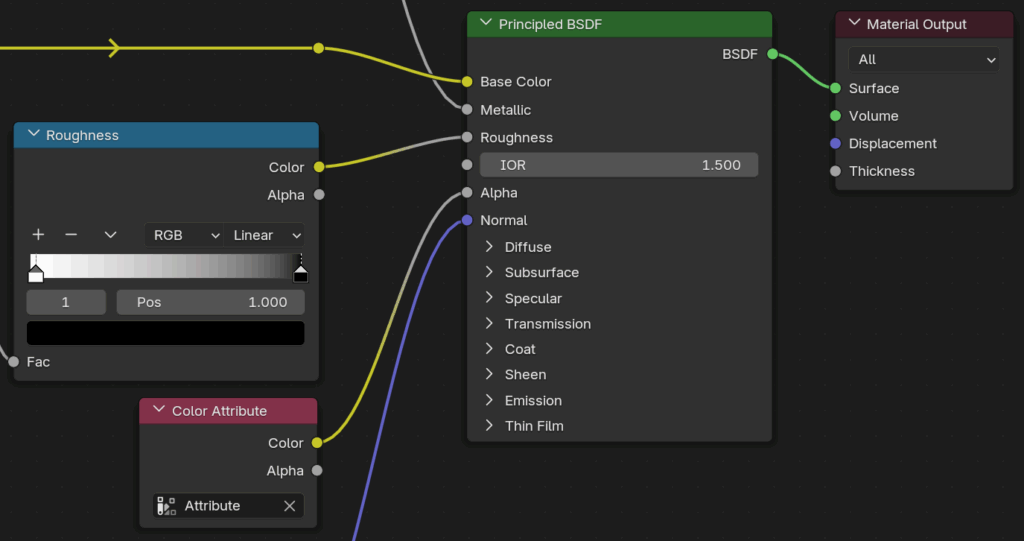
I created the alpha mask by painting a black and white vertex color mask directly on the highpoly mesh. The following picture is a rendered version of that mask – the actual mask is pure black and white.
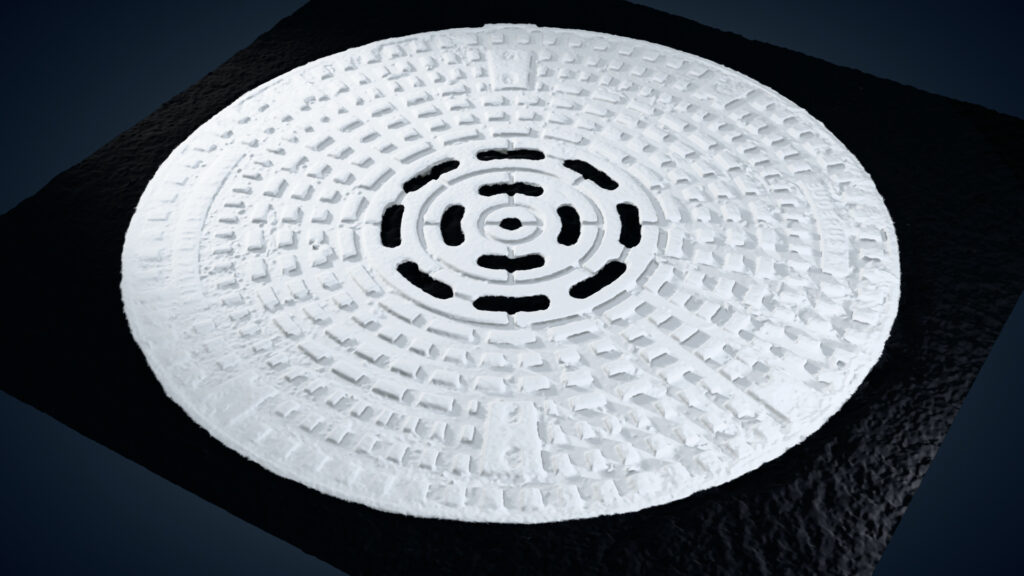
This vertex color mask is then fed into the highpoly mesh material’s Alpha slot.
Baking the highpoly textures
In theory, you can do all your baking with Blender’s default tools. However, right now (Blender 4.5.3) Blender’s default baking workflow is still horribly clunky and requires a lot of manual interaction. I use the SimpleBake addon (20$ for a single user, again no paid promotion) for all my baking needs because it speeds up the whole process considerably.
I won’t cover SimpleBake’s usage in detail in this tutorial, because SimpleBake has excellent tooltips that guide you through everything. But here’s what I did in general:
- I added a simple plane that covers the entire manhole cover. The highpoly will be baked to this plane as textures
- In SimpleBake, I chose the highpoly as my Bake object and the plane as my Target
- I used the PBR Bake workflow and enabled the following textures: Diffuse, Metalness, Roughness/Glossy, Normal, Alpha
- I baked everything at 4k
- Under Export Settings, I enabled Export bakes. This saves all baked textures on disk
- Under Other Settings, I enabled Copy objects and apply bakes. This creates a new Collection where it puts a copy of the bake plane and automatically applies a PBR material with all maps to it